In every autumn walk, there is a moment when you stop, bend down, and pick up that perfect leaf. It is a small, almost instinctive desire to hold on to a piece of the season’s short-lived splendor. But so often, that red maple or golden ginkgo ends up a crumbled memory in a coat pocket a week later. What if you could turn those transient treasures into permanent works of beauty?
Drying leaves to create dried leaf art is a gentle and very rewarding craft that allows you to capture the essence of fall in your hand and keep it vivid for years to come.
This is not about complex artistry; all you need to do is put in a few basic principles of preservation and let nature do the design. The result? More than just a design, it is a tie to an unforgivable moment you can put on your wall or as decor on your table.
The Foundation of All Great Dried Leaf Art: Proper Preservation
The key to a lasting leaf versus one that browns is in the prep. You must focus on reducing moisture and preserving color and structure.
Art from Dry Leaves begins with choosing the right preservation method to ensure your creations remain vibrant and durable for years.
- The Power of Pressing: In some cases, the simplest method is the most effective. Carefully place your clean, dry leaves between two sheets of parchment or newsprint paper, then stack heavy books on top. Let them rest in a dry spot for 1-2 weeks. This slow, weighty process flattens the leaves elegantly and can help retain more original color than faster methods. For a slight sheen and faster results, place the leaf between sheets of wax paper, cover with a thin tea towel, and press with a warm iron for a few seconds. The wax seals and preserves at the same time.
- Making Dynamic, Flexible Leaves: If your vision for dried leaf art involves bending or weaving, a glycerin bath is your key to success. In a shallow tray, mix one part glycerin with two parts of warm water. Put the leaves fully in the solution and use a plate to hold them underwater. Within 3 to 5 days, the leaves will have absorbed the solution and come out supple and leathery with deep, preserved colors that are great for 3D projects.
Three Timeless Dried Leaf Art Projects to Inspire You
With your palette at its best, the creative options are endless. These projects are what are considered entry points into the world of permanent botanical art:
Framed Botanic Art
This method transforms your leaves into stunning Leaf Wall Art for a botanical wall garden. What you will need is a deep shadow box, your pressed leaves, and a base of neutral colored card or fabric.
Play around with the design of the background first before gluing. Try a symmetrical mandala that grows out from a center point, a minimal cluster in a corner, or a flowing diagonal form that leads the eye. Use small dots of acid-free glue or a glue pen to attach each leaf. The magic comes in the negative space that allows each specimen to breathe. Once you frame behind glass and seal, your piece is protected from dust and air, ensuring your dried leaf art will look the same season after season.
Create an Autumn Leaf Wreath
Say welcome to the season with a wreath that puts natural elements on display. Get a grapevine or straw wreath base, some of your glycerin-treated flexible leaves, floral wire, and a hot glue gun.
Start by inserting small groups of leaf stems into the wreath base, and secure them with dots of hot glue or wraps of floral wire. For the next layer, use larger, more noticeable leaves that you may turn in the same direction to produce motion. The glycerine-treated leaves will maintain their shape very well, an important improvement over normal dried leaves that tend to break.
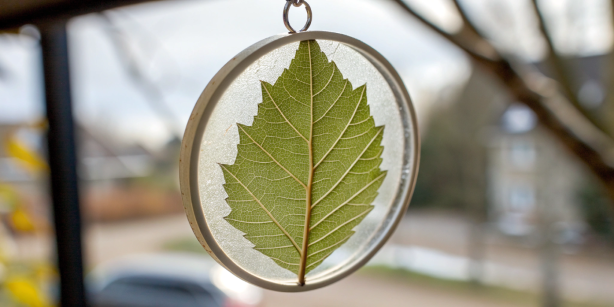
Create Shimmering Resin Jewelry
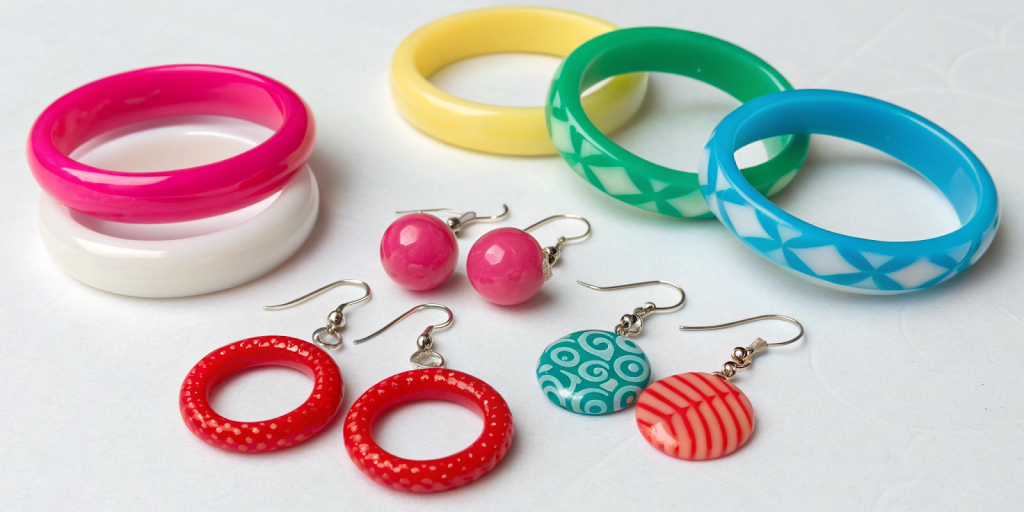
In the case of wearable dried leaf art, clear resin is the ideal medium. You can use it to encase small, delicate leaves in a see-through, yet very durable finish.
Select your tiniest and most detailed pressed leaves: a single fern leaf, an oak leaf vein, or a piece of maple confetti. Mix up your two-part epoxy as the package says. Into a silicone jewelry mold (pendant, earring, or cabochon shapes), pour a thin layer, let it set until it is sticky, then with tweezers, very carefully place your leaf in. Add a second layer of resin. As it cures over the 24-to-48-hour period, it will harden into a glass-like finish, which in turn will preserve every fine detail and color variation of your dried-out leaf.
Caring for Your Botanical Creations
To make your dried leaf art last a lifetime, it takes only a little bit of careful attention. Sunlight is your greatest enemy in this regard, as it will fade out even the best-preserved pigments over time. Put your Nature inspired gift in bright but indirect light, keep them in a consistent environment that is neither humid nor too dry, and very gently dust in framed pieces or resin items with a soft dry cloth.
In the end, what you do is have a private, calm conversation with nature every time you see your dried leaf art. It asks that you pay close attention, that you value details, and, in turn, you enter into the practice of preservation. The beautiful dried leaf art is more than a thing; it is a preserved moment of beauty, a personal heirloom that brings the crisp air and golden light of autumn into your home with you, forever.


