
There is a special feeling with the sound of a leaf crunched between your toes and the brilliant red and gold of falling leaves that signals the change of a season. Many have the instinct to collect a particularly perfect leaf, a mini-work of art in itself, of color and vein. But within a few days, that great find of yours is usually shriveled and colorless. What if you could preserve that autumn beauty as you found it? The good news is, with a few easy techniques and a bit of creativity, you can create great leaf crafts that will last a lifetime.
The key to doing this isn’t complex at all; it’s all about the application of a few basic preservation principles. We are talking about either drawing out the moisture in the leaves or protecting them from the air that causes decay. The results are beautiful and very satisfying leaves, making a simple walk in the park into a great source of home decor and personal gifts.
The First Step: Gathering Your Leaves for Crafting
Before jumping into the creative process, a bit of preparation will ensure that your leaf crafts will stand the test of time. After all, we want to preserve color and flexibility.
- Pressing is Your Best Friend: Simply place your clean, dry leaves between layers of parchment or newspaper, then stack heavy books on top and leave them for 1-2 weeks. Optionally, you can place your leaf between sheets of wax paper, cover it with a thin cloth, and iron for a few seconds on each side. This method of using wax paper gives the leaf a nice, natural shine.
- The Glycerine Bath for Soft Leaves: For leaves that you wish to keep supple and want to use in crafting, like weaving or bending, a glycerine bath is a fantastic choice. Combine one part glycerine (you’ll find it at pharmacies or craft stores) with two parts of warm water in a shallow container. Place your leaves fully into the solution and weigh them down with a plate. In 3-6 days, the leaves will have taken up the solution, making them very pliable while retaining their deep, earthy color for years.
Three Timeless Projects to Try
With your leaves preserved and ready, it’s time to start making some leaf crafts. These Leaf Crafts & Art are easy for a quiet Sunday afternoon, yet the results will be something you will love and cherish.
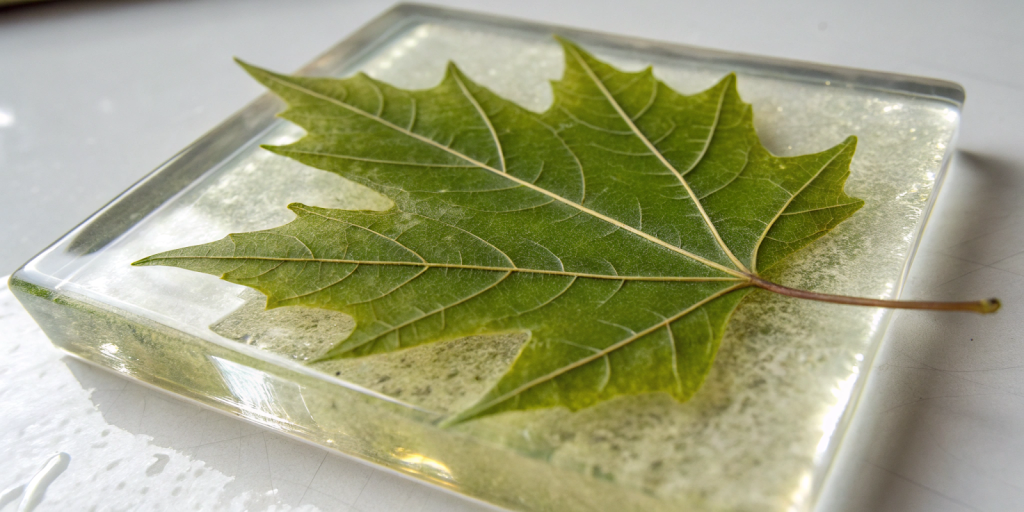
Create Gilded Leaf Decorated Coasters
This project is a mix of preservation and art. What you’ll need are clear glass coasters, your pressed leaves, and Mod Podge or a decoupage medium.
Place your pressed leaves at the bottom of the glass coaster; that’s right, the bottom. By doing this, the glass protects the leaf from spills and marks. Use a soft brush to apply a thin layer of decoupage glue over the leaf, sealing it into the glass. Let it dry completely, then add 2-3 more coats of glue in between, and allow each one of them to dry. The glue dries clear, letting the leaves be perfectly visible through the glass. The result is a functional work of art that comes alive as morning coffee is poured over a permanent autumn scene.
Design a Botanical Light Luminaire
Capture the essence of the season in a gentle, ambient light. For that, you will need a clean glass jar, pressed leaves, and white glue slightly thinned with water.
Using a paint brush, apply a thin layer of the diluted glue to the back of the leaf, and gently press it into the outer surface of the jar. Repeat the process with different leaves, layering them over each other a little, until you end up with a pattern you like. Once dry, if you want, you may seal the jar’s outside with a second coat of the glue or Mod Podge for protection. Put in a battery-powered tea light. Once lit, that will cast out the prettiest of shadows, and you will have a classic piece for your mantle or dining room table.
Keep Memories in a Resin Paperweight
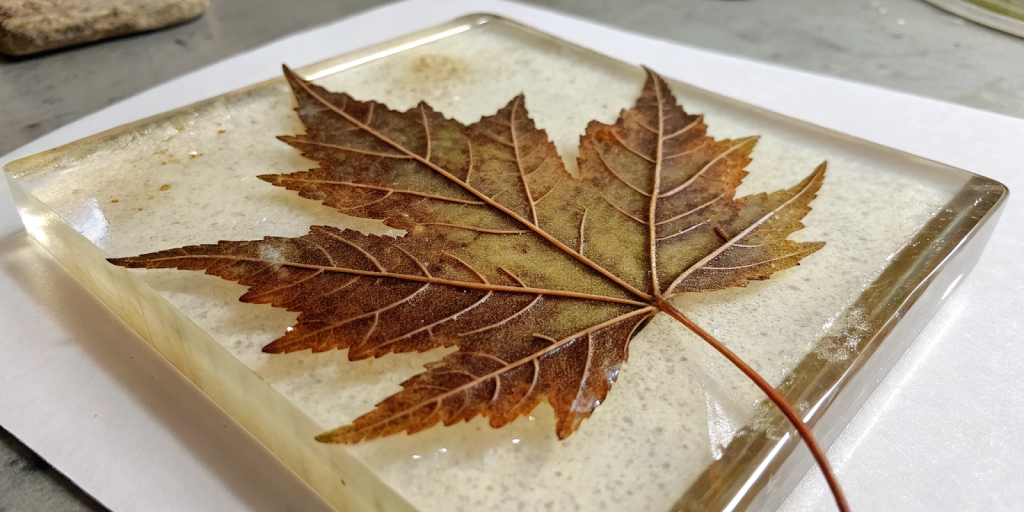
For a professional result, trying out resin embedding of leaves can produce a very impressive result. There are also some kits available that are very easy to use and easy to get.
Make sure your leaf is fully dry and pressed out. Use the resin kit instructions to mix the two-part epoxy. Pour a thin layer into a silicone mold (simple circles or squares work great). Let it set a bit until it is tacky, then gently place your leaf on top. Slowly pour the remaining resin over the leaf to the desired thickness. As it cures over 24-48 hours, the bubbles will rise to the top, leaving your leaf suspended in a clear block of resin, with every detail preserved without fade. It is a great way to remember a special day or place; something that big companies, such as Picture On Leaf, specialize in creating.
Keeping Your Crafts Vibrant for Years
The last step in making your leaf craft permanent is protection. No matter what your project is, after you finish your leaf crafts, do not put them in the sun for long periods of time, as this is the main cause of fading for natural materials. Display them in bright areas right above direct sunlight.
For cleaning, use a dry soft cloth. Lastly, do not put them in damp areas, like in the bathroom, as such conditions may cause damage over time to the leaf crafts.
The beauty of these projects is not in the design, but in the time it takes, the care put into each leaf, and the mindfulness of the creation. It is a connection to a point in time; a brisk October hike, a walk filled with a child’s laughter, the peace of your own backyard.
These simple leaf crafts are more than items; they are preserved memories, fragments of a season that you hold in your hands and glow with the truth that some of nature’s simplest gifts can last a lifetime. So on your next walk, look down; your next great work may be waiting.


